More Device Groups Can Now Be Used in eWeLink Scenes
Control more device groups in eWeLink scenes for simpler, faster everyday automations.

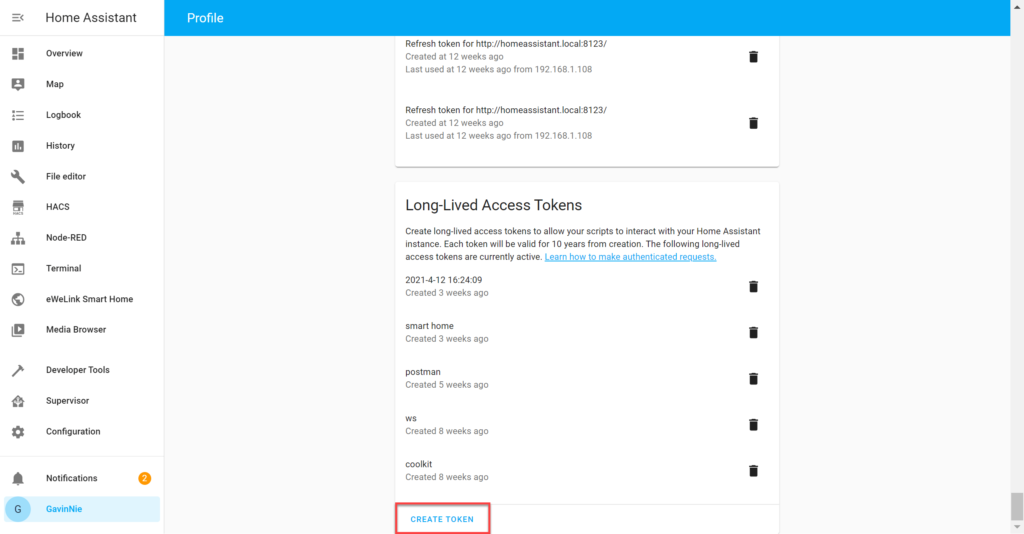
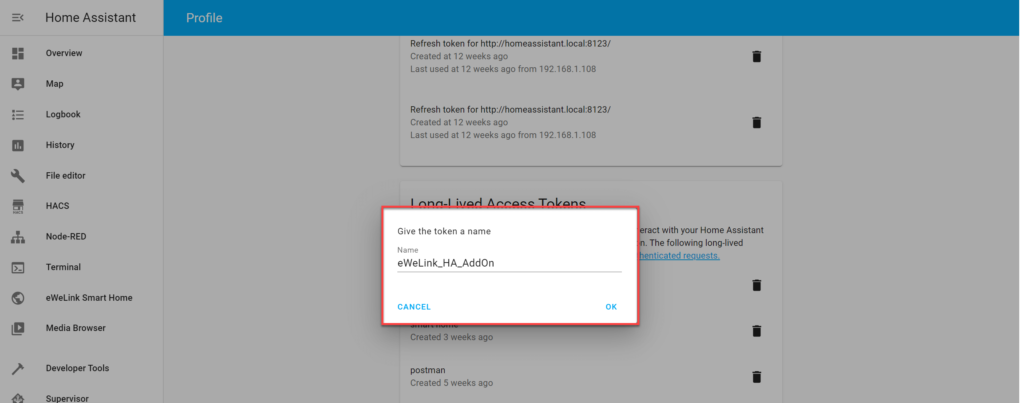
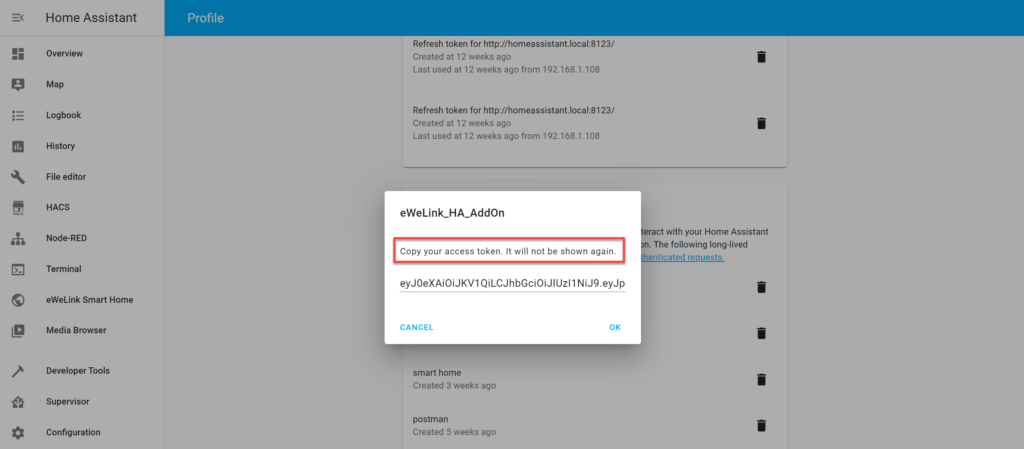
Create Long Lived Access Tokens eWeLink Add-On connects eWeLink Support devices by calling Home Assistant’s REST API and WebSocket API. A long-lived access token is required. Log in to the Home Assistant Lovelace console (usually the URL is http://homeassistant.local:8123/), click the user name at the very bottom of the sidebar to enter User Profile, find the Long-Lived Access Token option at the bottom of the page and click CREATE TOKEN. Enter a token name in the Give the token a name modal box (eWeLink_HA_AddOn is recommended) and click OK. Copy the token you just generated and paste it somewhere secure.
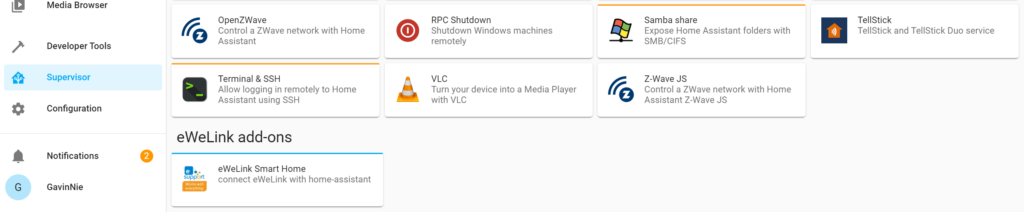
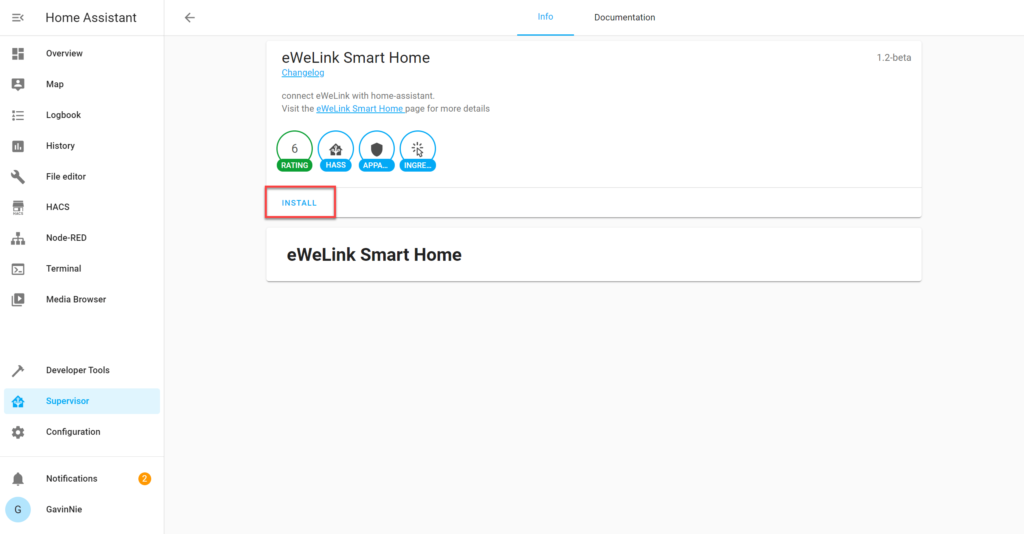
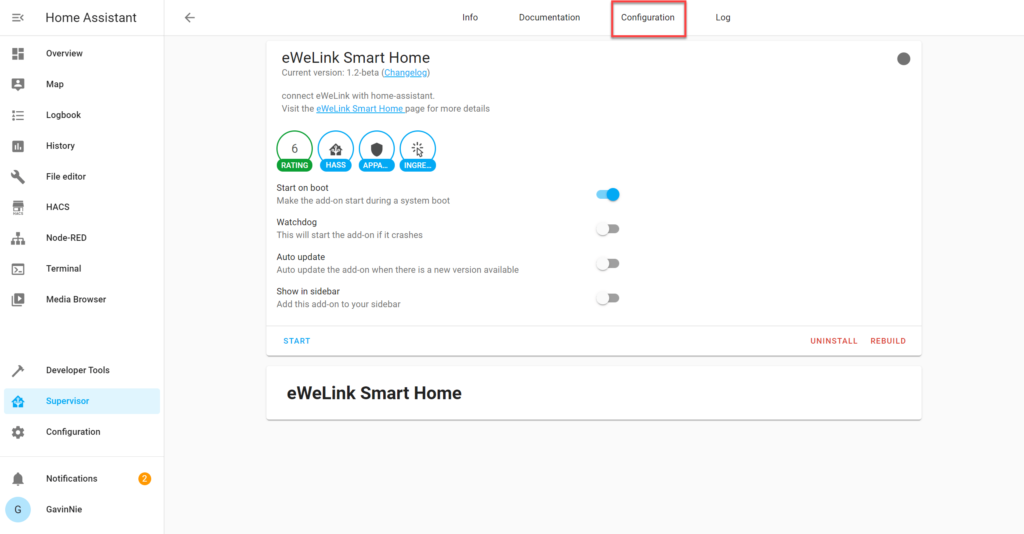
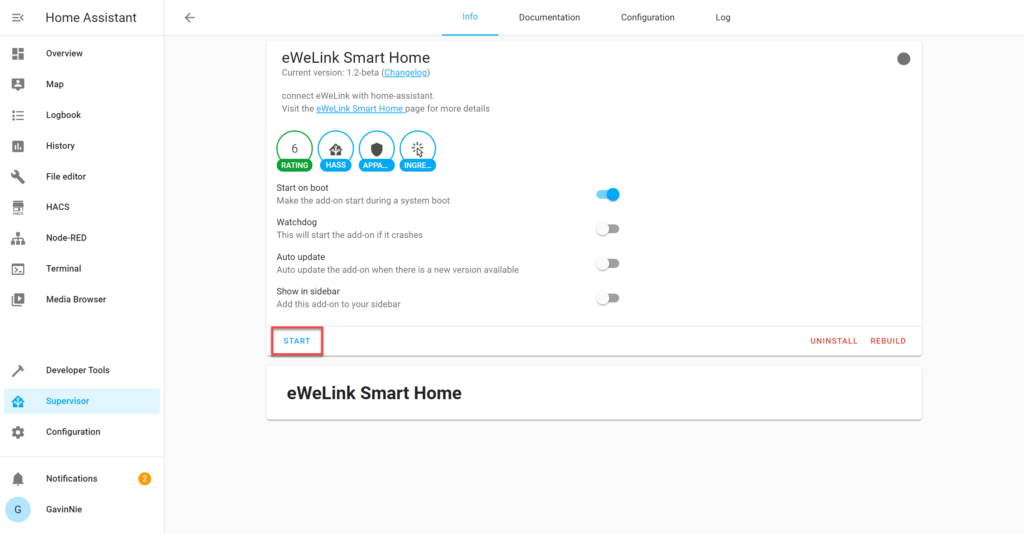
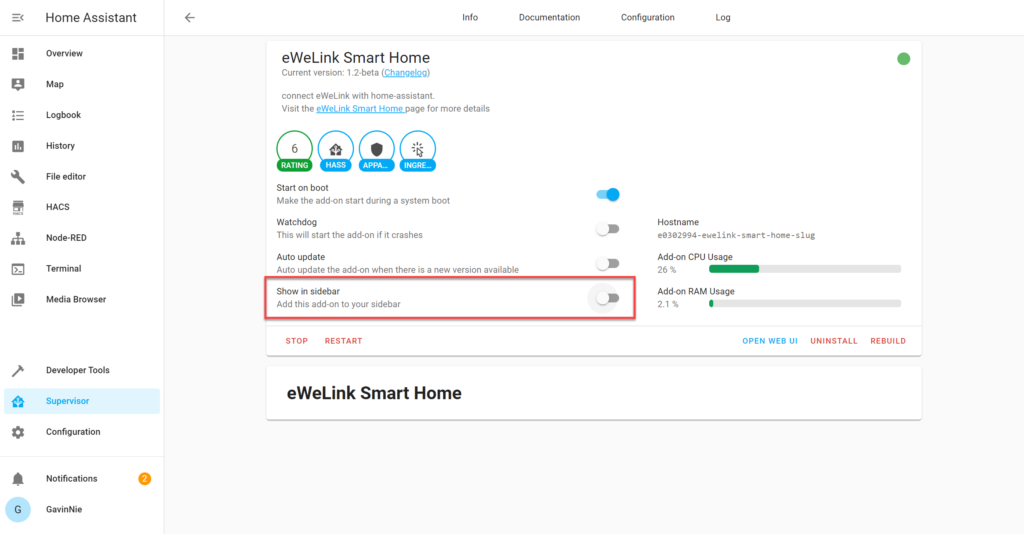
Log in to the Home Assistant Lovelace console (usually the URL is http://homeassistant.local:8123/), click Supervisor at the sidebar to open the HassOS dashboard, switch to the Add-on Store tab. Click the vertical ellipsis (three vertical dots) in the upper right corner, select Repositories in the pop-up menu, enter the of ficial add-on address of eWeLink: https://github.com/CoolKit-Technologies/ha-addon in the Manage add-on repositories modal box, click ADD. After closing the modal box, you can see the newly added eWeLink add-on at Add-on Store page. Click the eWeLink Smart Home card to open the add-on information page, click INSTALL and wait for the installation to complete. Once it is done, do not click the START right away, instead, switch to Configuration, fill in the long-lived access token and click Save. Then go back to the Information tab and click START to enable the “eWeLink Smart Home” add-on. Note: To facilitate quick access to the eWeLink Smart Home add-on, you can enable the Show in sidebar option.


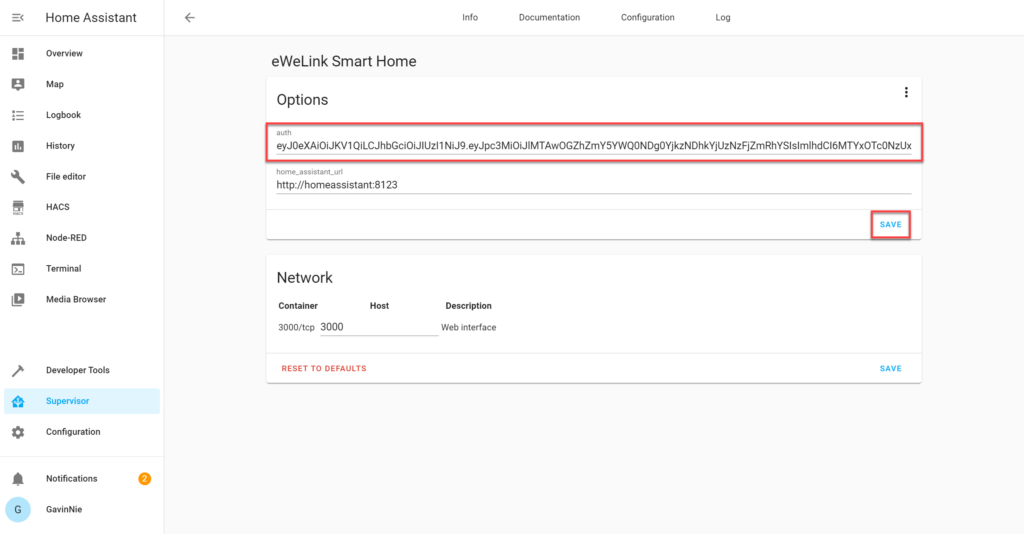
*Tip: You need to change the home_assistant_url if you are using docker or other versions of Home Assistant that is not Home Assistant OS.
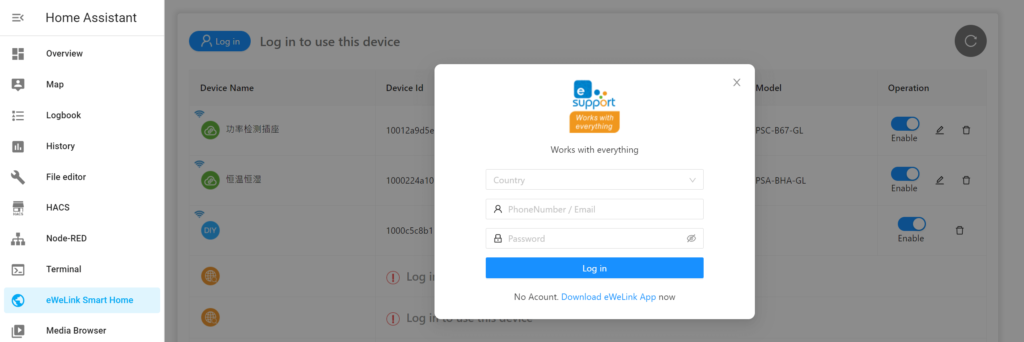
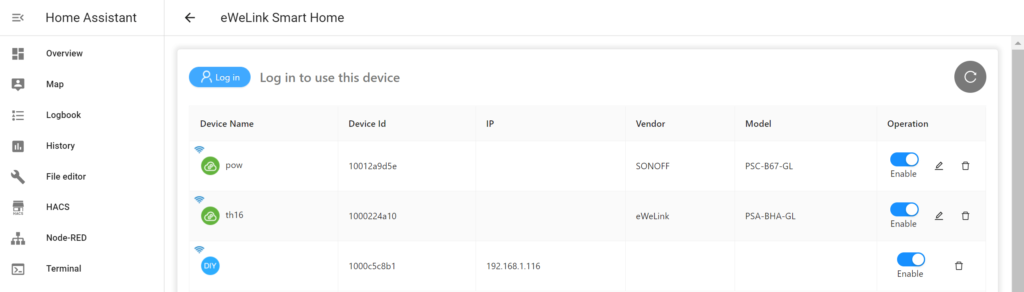
Control eWeLink DIY devices on LAN or log in to eWeLink account to control all eWeLink Support devices. Log in to the Home Assistant Lovelace console (usually the URL is http://homeassistant.local:8123/ ), click Supervisor at the sidebar to open the HassOS dashboard, then click the eWeLink Smart Home card to enter the add-on information page. Click OPEN WEB UI, the eWeLink Smart Home Web UI page will list all DIY devices on LAN searched by mDNS. You can also click the Login button in the upper left corner and log in to the eWeLink account to connect all eWeLink Support devices. Note: Currently, the beta version only supports switches and sockets, more device types will be supported soon.
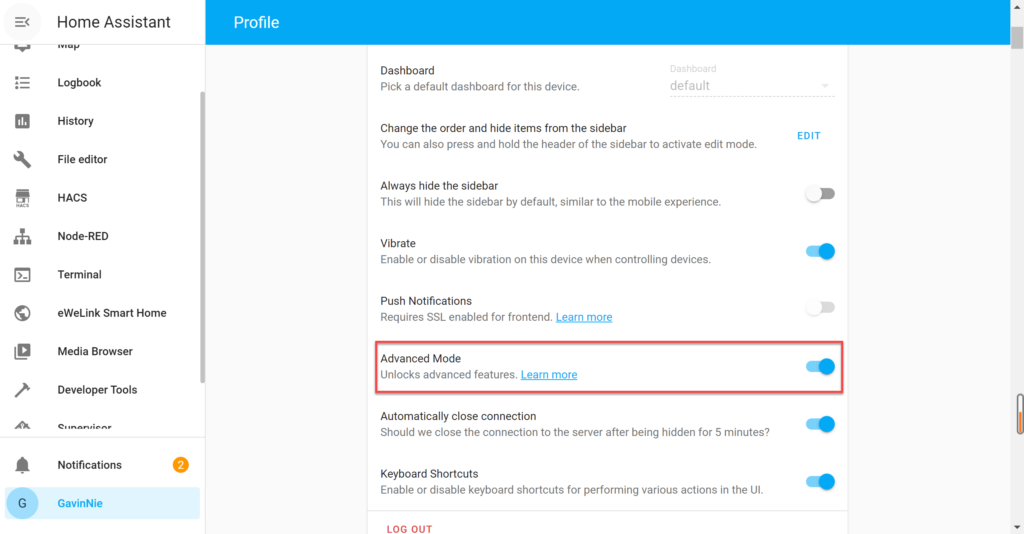
💡Setup Scene, Automation to control eWeLink Support devices. Devices connected through Home Assistant REST API and WebSocket API can only be mapped as entities instead of devices, which makes it impossible to directly control devices via Home Assistant’s Scene and Automation. To solve this problem, you need to enable the Advanced Mode (Lovelace Console > Profile > Advanced Mode). To use eWeLink Support devices in Automation, you need to first create Scene that contains your devices, and then select Activate Scenario in Action > Action Type of Automation.
Control more device groups in eWeLink scenes for simpler, faster everyday automations.
Create a Home Map and control devices from a visual floor plan.
Faster smart home control, now with support for more devices on iOS widgets.