Floor Plan in eWeLink WEB V3.26.0: Build and Manage Your Home Map
Create a Home Map and control devices from a visual floor plan.

Floor Plan helps you create a visual map of your home, organize smart devices by room, and control them directly from your Home Map.
With eWeLink WEB V3.26.0, Prime plan subscribers creating floor plans is now easier than ever. New built-in guidance, visual tool demonstrations, and a simplized editing experience help you get started with confidence and spend less time switching between tools.
While these guides provide assistance throughout the creation process, this article offers a complete walkthrough of the entire workflow—from creating your first floor plan to organizing devices and managing your Home Map.
Whether you’re creating a simple apartment layout or a multi-floor home, the steps below will help you build your floor plan more efficiently.
Before you start drawing, you’ll first need to create a floor plan for your Home.
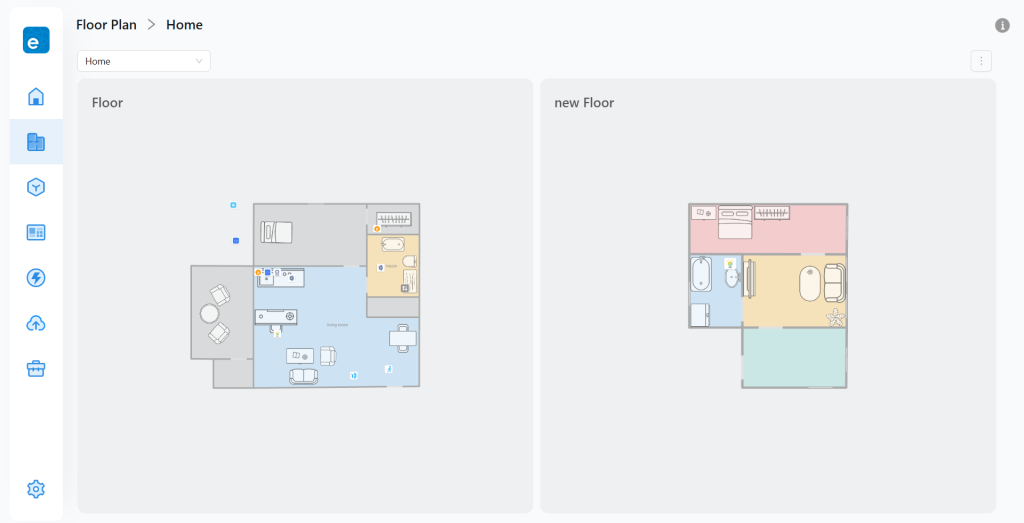
Open the Floor Plan page and click Get Started. Then select the Home where you’d like to create your floor plan.
Each floor plan belongs to a specific Home, allowing you to organize rooms, devices, and floors separately.

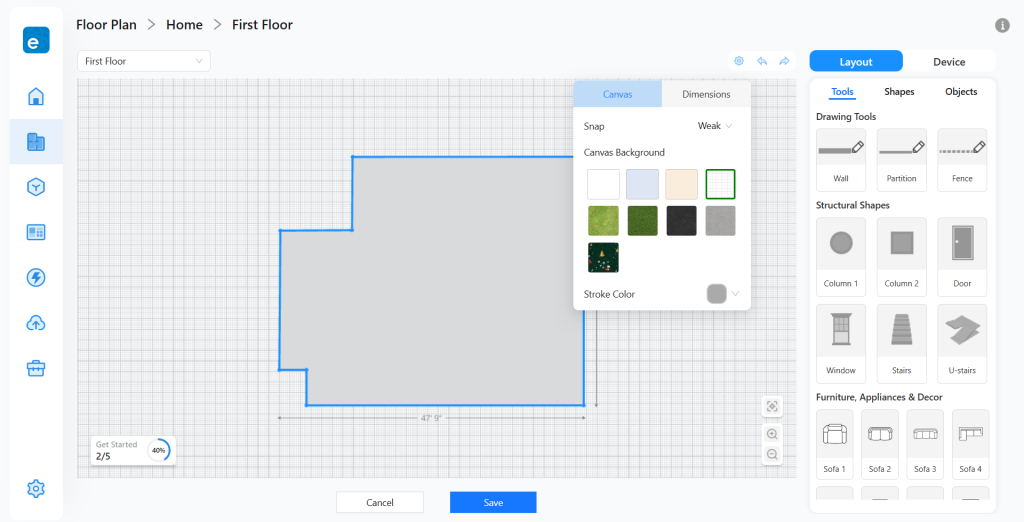
Before you start drawing, it’s worth taking a moment to review the available drawing settings. These options can help make the editing experience more comfortable and ensure your floor plan matches your preferred style and measurement system.
The editing workspace can be customized to suit your preferences:
These settings only affect the editing experience and can be adjusted at any time.
Floor Plan supports both metric and imperial units.
Whether you’re more comfortable working with meters (m) or feet (ft) , selecting your preferred unit before drawing can help create a floor plan that better matches your home’s dimensions.
The measurement unit can be changed at any time while editing.
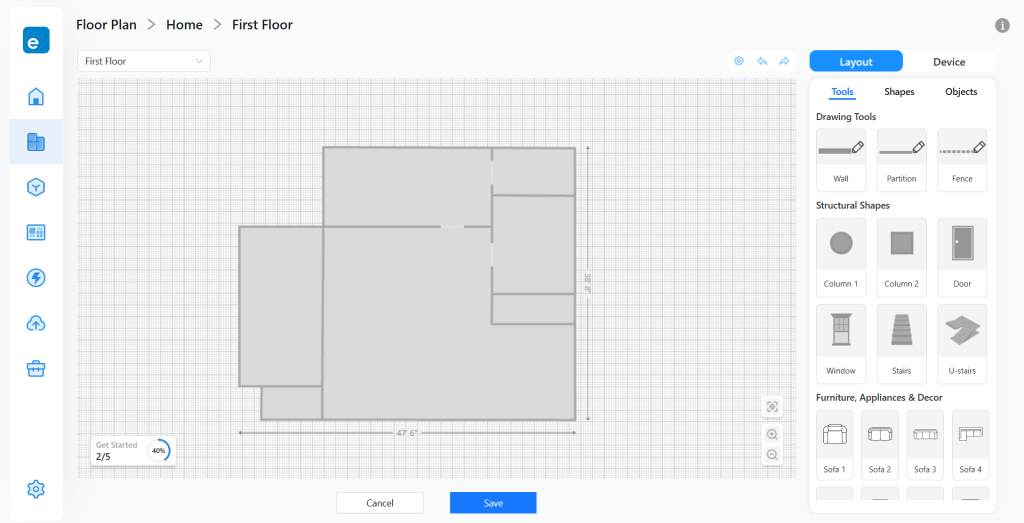
Every floor plan starts with the structure of your home.
Using walls, partitions, and fences, you can create the shape of your living space and define different areas within it. There is no single correct way to draw your layout. The best approach depends on whether you prefer to start with the overall structure or individual rooms.
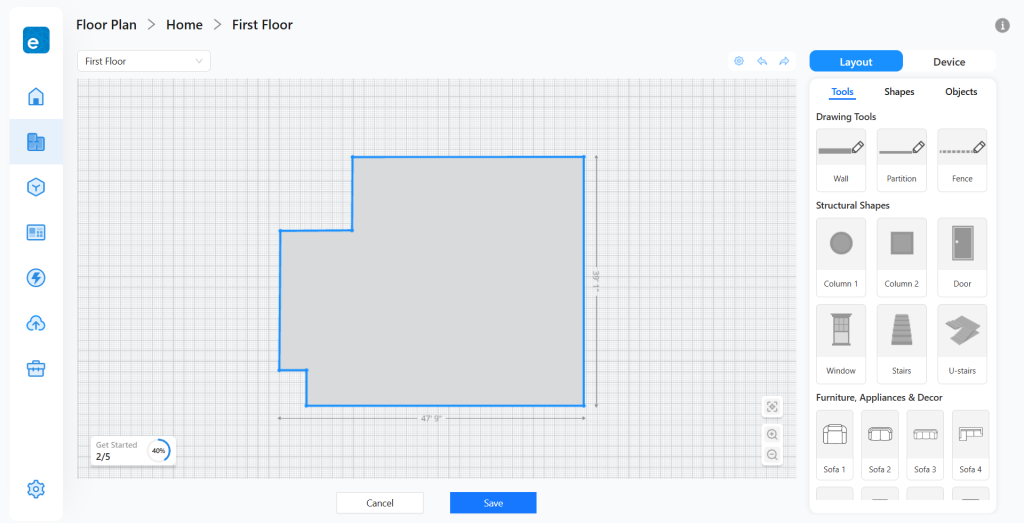
Method 1: Outline → Rooms
Draw the outer boundary of your home first, then use partitioning tools to divide it into rooms.
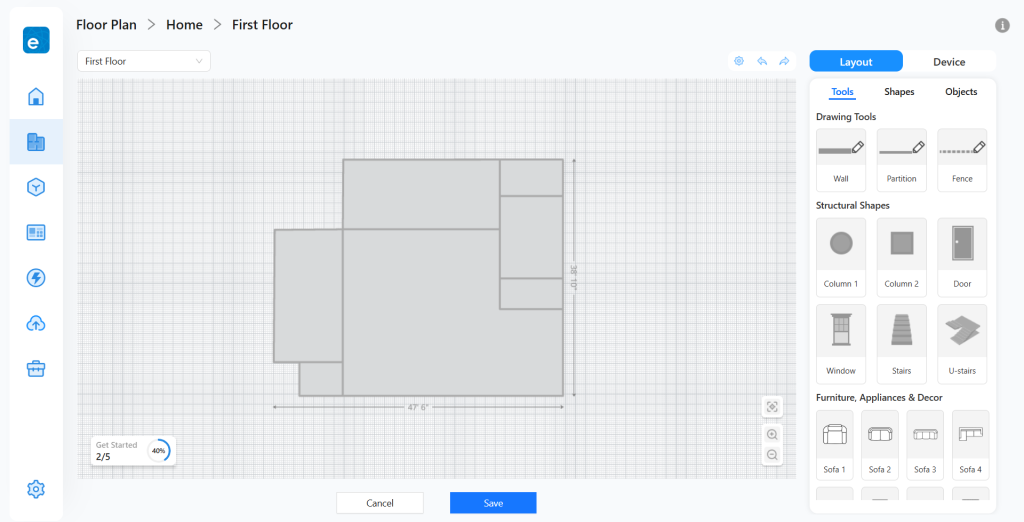
Method 2: Rooms → Layout
Draw rooms individually first, then move them to assemble the complete structure.
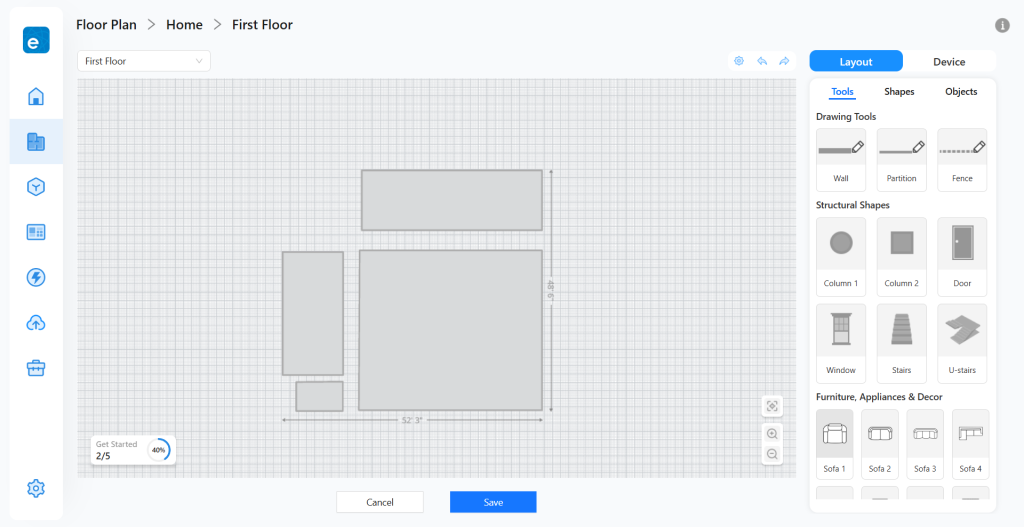
While drawing, several tools can help improve accuracy and efficiency:
Once enclosed areas have been created, your home structure is ready for the next stage.
After the basic layout is complete, you can switch to the Shapes tab to begin adding the architectural details that make your floor plan easier to understand.
You can enrich your floor plan with:
Once placed, they can be resized, rotated, duplicated, or removed at any time. Doors and windows automatically align with nearby walls, helping you build your floor plan more efficiently.
At this stage, the overall structure of your home should closely match its real-world layout.
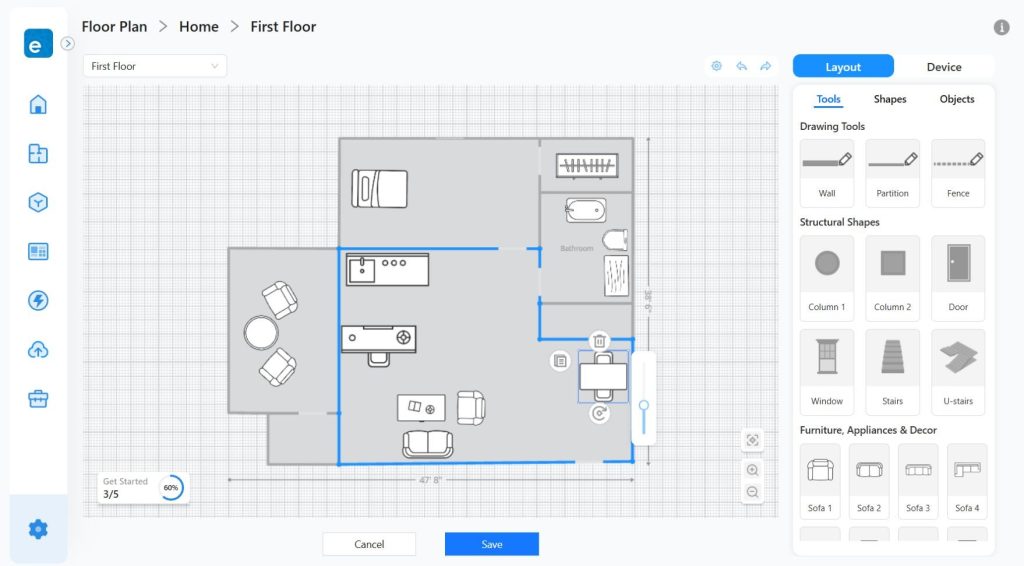
With the structure in place, you can start turning your floor plan into a more complete representation of your home.
Switch to the Objects tab to customize each area and add the details that make your Home Map easier to recognize at a glance.
Furniture, appliances, and decorative objects can be added to reflect the actual layout of your living space.
Whether you’re placing a sofa in the living room, a refrigerator in the kitchen, or decorative items throughout the home, these objects help create a more realistic and intuitive Home Map.
Once placed, objects remain fully editable.
You can move, rotate, or resize furniture and appliances at any time, allowing you to refine the layout as your home evolves.
When all rooms, furniture, and appliances have been added, the interior view of your home is complete and ready for device placement.
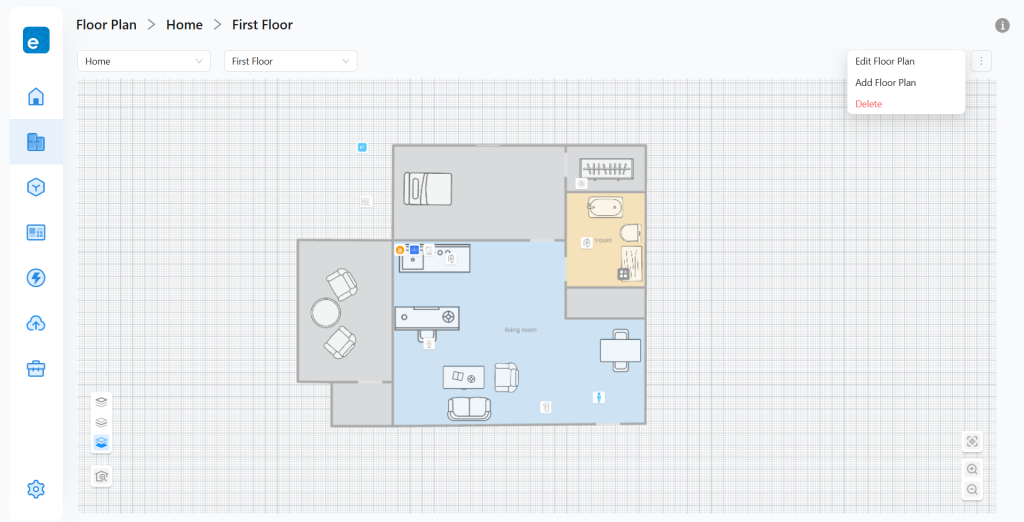
With the layout complete, switch to the Device tab to connect your floor plan with your smart devices.
For each area on the map, simply select the corresponding room, such as Living Room, Bedroom, Kitchen, or Bathroom.
Rooms are based on the room structure already configured in your Home. If needed, new room can be created and room names can be modified from the Home page before building your floor plan.
Room colors can also be customized to make different areas easier to distinguish.
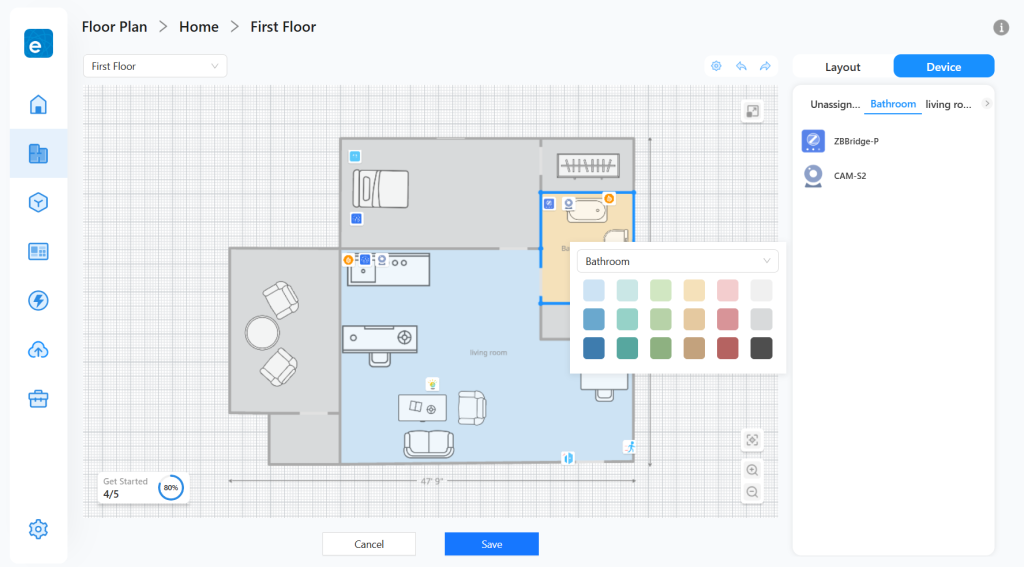
Devices are automatically grouped under the rooms they were assigned to when added to your Home.
Once a room has been placed on the map, devices belonging to that room will appear in their corresponding areas.
For example:
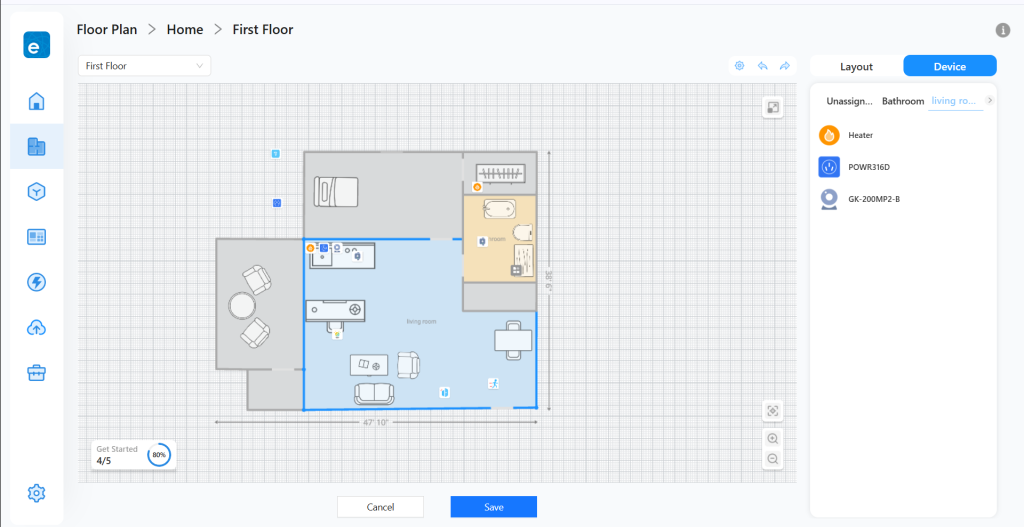
This is where your floor plan becomes an interactive smart home dashboard. Once rooms have been assigned, you can begin arranging devices to reflect their real-world locations.
You can also customize how devices appear on the map:
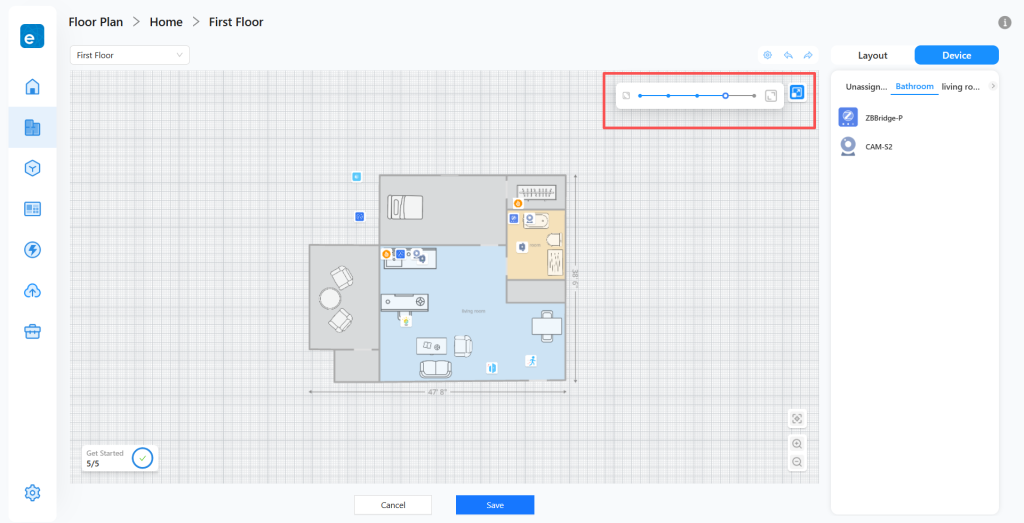
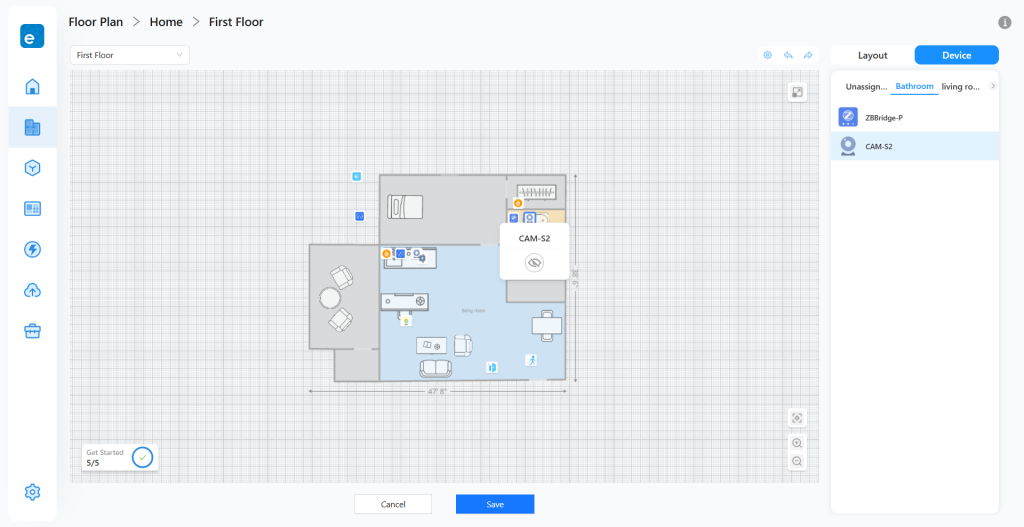
Devices in the “Unassigned” list can be placed by dragging their icons to any area on the map.
These adjustments help create a cleaner and more intuitive Home Map while keeping important devices easy to locate and control.
Once rooms and devices have been arranged to your liking, click Save to complete your floor plan.
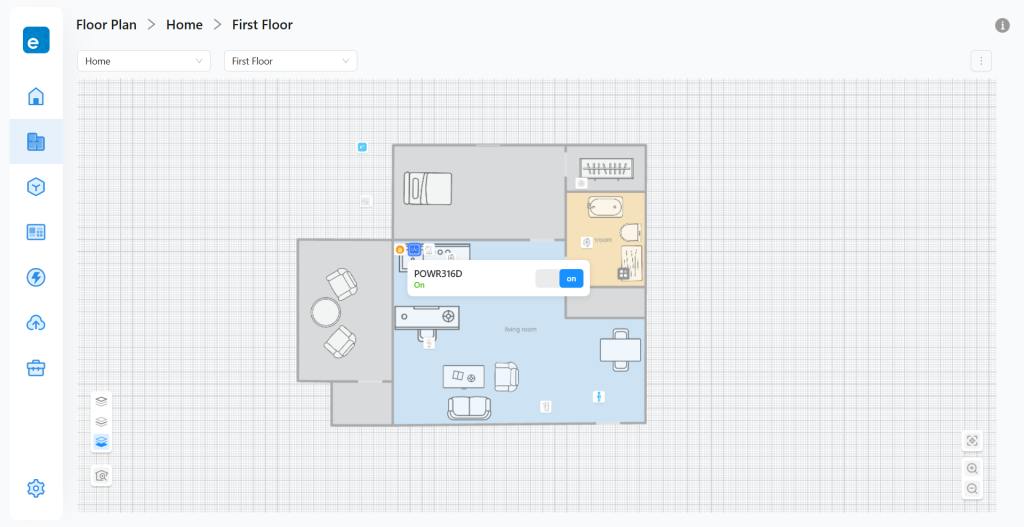
Once saved, your floor plan becomes an interactive smart home dashboard. Instead of navigating through long device lists, you can view your home visually and interact with devices exactly where they belong.
From the Home Map, you can:
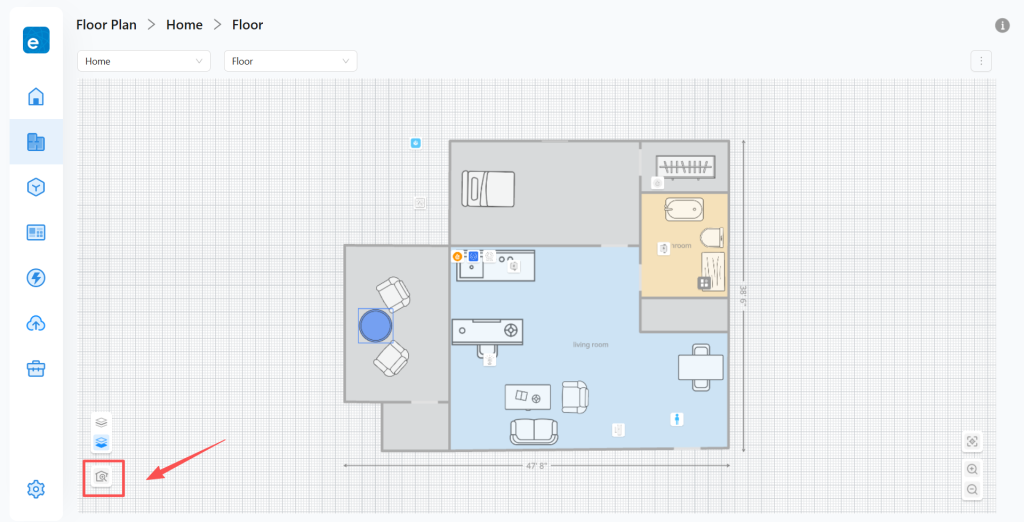
With your Home Map in place, managing your smart home becomes more visual, intuitive, and efficient. As your home evolves, you can update your floor plan at any time to keep devices, rooms, and layouts perfectly organized.
Create a Home Map and control devices from a visual floor plan.
eWeLink App V5.21 brings smart home control to your Wear OS watch.
The latest version of the eWeLink app (Android v5.7) has just introduced exciting new integration with Android Auto, empowering you to control your connected home devices right from your vehicle’s center display!
The latest version of the eWeLink app (iOS v5.4.1) has just introduced exciting new integration with CarPlay, empowering you to control your connected home devices right from your vehicle’s center display!